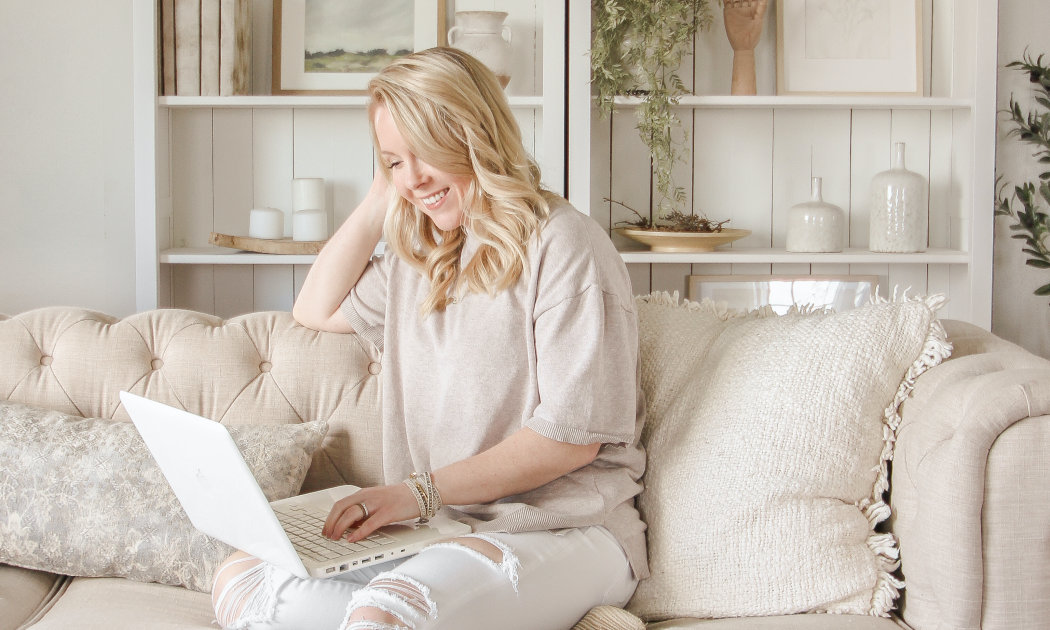
Thursday, May 23, 2013

Kid's Drawstring Bag made with Silhouette Fabric Interfacing plus a GIVEAWAY!

114 comments:
- This post is brought to you by Silhouette. -

Hey all! Today I have the CUTEST little drawstring backpack to share with you that I made using Silhouette fabric interfacing plus a new promotion from Silhouette! There are some awesome sales going on right now, AND I'm giving away a Silhouette Portrait to one lucky reader! {squeal!}

Learn how to easily cut fabric to create this adorable Kid's Drawstring Bag! LoveGrowsWild.com


In case you haven't noticed yet, I've fallen head-over-heels in love with my Silhouette machine, and I'm constantly amazed at all the things I can do with it! Did you know that it can not only cut vinyl and paper, but fabric too? My mind was totally blown! 

I picked up a plain drawstring bag from Joann Fabrics the other day thinking it would be the perfect little bag for my youngest son, Wyatt, to carry around. He is always running around with me being Mommy's little sidekick, and it would be nice for him to have a bag to carry his snacks, toys, etc. around in. I knew I wanted to add a cute design to the bag, and Silhouette's fabric interfacing made it super easy! They have two fabric interfacing products, sewable and clean cut, and a special blade made just for cutting fabric.

I didn't want to sew the design onto the bag, and it shouldn't need to be washed so I chose to use the Clean Cut Fabric Interfacing. I found an adorable bicycle design in the Silhouette Online Store and added it to my bag using the fabric interfacing along with the words "enjoy the ride." Super cute, right?

Here is how I used the Silhouette Fabric Interfacing: 

Learn how to easily cut fabric to create this adorable Kid's Drawstring Bag! LoveGrowsWild.com

1. First I cut a piece of the fabric interfacing about an inch larger than my bicycle design and placed it underneath my fabric with the rough side facing up. Then I ironed the fabric over the interfacing for about two seconds. 

2. I trimmed away the fabric around my interfacing square and pulled the paper backing from the fabric.  The back of the fabric will be shiny and smooth now. Then I carefully placed the fabric, adhesive side down, onto my cutting mat. Make sure there are no air bubbles and the fabric is laying flat!

3. After switching my normal cutting blade with the fabric blade, I sent the bicycle design from my Silhouette Studio software on my computer to the machine and watched it cut the fabric with ease!
Side-note: I adjusted the cut settings slightly to cut the fabric better. I recommend doing a test cut first to see if you need to adjust your settings! I had mine set to this: Speed: 3 Thickness: 30 Blade: 4 per Linda's instructions from Craftaholics Anonymous .

4. I gently peeled away the outline of my design, leaving the bicycle on the cutting mat. 

5. Then I carefully removed the bicycle from the mat and placed it centered on my drawstring bag. Make sure you don't remove the adhesive from the fabric when you peel your design off the mat!

6. I ironed over my fabric design firmly for about 8 seconds until it was set in place. 

7. To add the words "enjoy the ride" below the bicycle design, I followed the same process I used before.

8. Once the letters were cut, I ironed those onto the bag too! 

Learn how to easily cut fabric to create this adorable Kid's Drawstring Bag! LoveGrowsWild.com

I think this bag is stinkin adorable, and it's the perfect size for my little guy. I love the drawstring top because it's easy for him to pull things in and out of the bag. 

Learn how to easily cut fabric to create this adorable Kid's Drawstring Bag! LoveGrowsWild.com

He loves carrying it around with him, and says it's his "school backpack." He doesn't go to school yet like his big brother, so he just pretends! The bag is so handy to haul his little toys around, especially when I need him to be entertained while we're gone. Anyone ever bring a 3 year old boy dress shopping or out to eat when nap time is getting close? NOT fun if they don't have something to keep them occupied! And of course, the bag is great for hauling his snacks too. Wherever my son is, food is never far behind. That boy is a bottomless pit, I swear! 

Learn how to easily cut fabric to create this adorable Kid's Drawstring Bag! LoveGrowsWild.com

But most of all, I love the sentiment behind the words. Even on our worst days, I try to remember that spilled milk, dirty fingerprints, and temper tantrums are all stepping stones to my little boys growing up. One day I'm going to blink, and my babies will have families of their own!
Life goes by fast, so remember to take time to enjoy the ride!

Learn how to easily cut fabric to create this adorable Kid's Drawstring Bag! LoveGrowsWild.com

Okay, now it's time for the good stuff! Let's check out Silhouette's awesome promotion this month with their fabric bundles:

Silhouette Fabric Bundle Promotion - Use code LOVEGROWS at checkout for your discount!

Silhouette Fabric Bundle - $29.99
1 of each fabric interfacing
fabric blade 
$25 Silhouette Online Store download card
(retail $53.97)

Silhouette Portrait Fabric Project Bundle - $129.99
Silhouette Portrait
1 of each fabric interfacing
fabric blade
$25 Silhouette Online Store download card
(retail $233.96)

Silhouette CAMEO Fabric Project Bundle - $269.99
Silhouette CAMEO
1 of each fabric interfacing
fabric blade
12 x 24 cutting mat
(retail $348.95)

Head on over to Silhouette's special promotion page and make sure to use the code LOVEGROWS at checkout to get your discount! The promotion runs from May 23 - May 31.

Now, who's ready to win a Silhouette Portrait?

Enter to win a Silhouette Portrait at LoveGrowsWild.com May 23 - May 27 #giveaway


Are you jumping up and down screaming, "me, me, ME!" I thought so : )
 Just use the Rafflecopter form below to enter the giveaway!

a Rafflecopter giveaway


I'm over the moon excited that one of you will get to win this awesome machine, and I cannot wait to see who the winner is! I'll announce the winner here on May 28th. GOOD LUCK!

Disclosure: The fabric interfacing and fabric blade were provided by Silhouette for this project. 

Let's Keep In Touch!
Subscribe to Blog | Follow on Facebook | Follow on Twitter
Follow on Pinterest | Follow on Instagram | Subscribe to Newsletter

P.S. I'm sharing this post at some awesome link parties... Check them out HERE!

Monday, May 20, 2013

Time to Sparkle Link Party #10

5 comments:
Hi friends! How was your weekend? Mine was AWESOME! My husband took both boys back home to Illinois to farm with his family since they've been behind with all rain this Spring. The kids got to ride the tractor, change flat tires, fill the planter boxes, and they were in hog heaven! Meanwhile I was enjoying my own little slice of heaven with 48 hours straight of peace and quiet! Woohoo!

This week at Love Grows Wild I started my kitchen makeover and shared my Vintage Kitchen Inspiration. I also shared the recipe for my favorite salad for Summer: my Crunchy Romaine Strawberry Salad. So yummy and so healthy too! And earlier today I showed a tutorial for creating a DIY Family Sign personalized with your wedding date. It's the perfect way to remind you of your special day and makes a wonderful gift for weddings and bridal showers too!

Love Grows Wild Projects

Now I want to see what YOU have been creating this week! I'm blown away each week with your talent, and I hope you find some inspiration here too!

Time to Sparkle Tuesday Link Party

Welcome to Time to Sparkle Tuesday Link Party, where you can find all the newest creative ideas from around the web! Stop by every Tuesday, link up your posts, and check out what others are sharing! You'll discover some amazing new blogs and find inspiration for projects, recipes, and more! This party is hosted by four lovely ladies, so your projects will be shared on ALL FOUR blogs!


Each week we will pick our favorite links as features, and share them on Facebook, Twitter, and Pinterest!

- Make sure to follow our Time to Sparkle Pinterest Board to see all the amazing features! -

How to Create a DIY Family Sign with your Wedding Date

6 comments:
Follow this easy tutorial to learn how to create a DIY Family Sign personalized with your wedding date! Make one for your home as a sweet reminder of your special day and the love you share. These signs also make wonderful gifts for weddings and bridal showers!

Learn how to create a DIY Family Sign personalized with your wedding date! These signs also make great gifts for showers and weddings! Get the how-to at LoveGrowsWild.com #wedding #diy


Wedding season is upon us, and this year I have a very special family member getting married in July. My husband's Aunt finally met her Prince Charming last year through their church, and though he has been married before and has three wonderful, amazing daughters (and two very cute grandchildren!), she has never been married and has waited a long time for this day. He is truly such a kind and loving man, and I am so grateful that they found each other!

When I got married, I received a gorgeous hand painted sign with our name and wedding date, and it is something I have cherished ever since. But every time I look at that beautiful sign I think, "I know I can make that myself!" And that's exactly what I did for our Aunt and soon-to-be Uncle!

Making their sign was so simple with a little bit of paint and some help from my Silhouette CAMEO! Follow these easy instructions to create a gorgeous family sign of your own:

First you'll need to choose the board for your sign. We have tons of scrap wood in our garage, so I grabbed this piece that was already cut to the size I wanted. Don't you just love when projects are simple like that? Then sand the board to a smooth finish to get it ready for paint. 

Learn how to create a DIY Family Sign personalized with your wedding date! These signs also make great gifts for showers and weddings! Get the how-to at LoveGrowsWild.com #wedding #diy

I've painted many things in my lifetime, and this is one of the best tricks I've learned along the way:

When you're doing a project that doesn't require paint on both sides, gently hammer a few nails into the back of the board around the perimeter. The board will sit up off your work surface, and you can easily paint the edges without having your board get stuck to the table! I'm telling you, this tip is a KEEPER! I highly recommend pinning it for later! 

AWESOME PAINTING TIP! Learn how to easily paint around edges without getting paint on your table!

First paint your board with a primer. 

Learn how to create a DIY Family Sign personalized with your wedding date! These signs also make great gifts for showers and weddings! Get the how-to at LoveGrowsWild.com #wedding #diy

Then paint at least two coats of your desired paint color. I love this Woodlawn Colonial Gray from Valspar. Just about my whole house is painted in this color! P.S. you can check out my easy method for storing and organizing leftover paint here!

Learn how to create a DIY Family Sign personalized with your wedding date! These signs also make great gifts for showers and weddings! Get the how-to at LoveGrowsWild.com #wedding #diy

Once the paint is totally dry, it's time to work on the lettering for your sign. I could have hand painted the letters (like I did here and here), but frankly I didn't have the time or patience for that method so I opted to use vinyl letters cut with my Silhouette machine. It's fast, easy, and looks much cleaner than painting everything by hand. Just open your Silhouette Studio software and add your last name in a large, traditional text. The little rulers on each side make it super easy to size the letters to fit your board. Once you're happy with the way it looks, feed a roll of vinyl into the machine and watch it do all the hard work for you!

Psst! If you don't have a Silhouette cutting machine yet, there's a big sale coming up on Wednesday! Make sure to check back to get a discount code and see what other amazing things Silhouette can do! Seriously, it's my absolute favorite crafting tool!

Learn how to create a DIY Family Sign personalized with your wedding date! These signs also make great gifts for showers and weddings! Get the how-to at LoveGrowsWild.com #wedding #diy

To easily transfer the cut letters to your sign, use a piece of transfer paper and place the letters in the center of your sign, slightly more towards the top. The grid lines on the transfer paper make it easy to keep the letters level. 

Learn how to create a DIY Family Sign personalized with your wedding date! These signs also make great gifts for showers and weddings! Get the how-to at LoveGrowsWild.com #wedding #diy

Peel away the transfer paper, and you have one part done! Only two more to go!

Learn how to create a DIY Family Sign personalized with your wedding date! These signs also make great gifts for showers and weddings! Get the how-to at LoveGrowsWild.com #wedding #diy

Next, create a second design in your Silhouette software with your wedding date and a special phrase. I chose "Our journey together begins here..." but my own wedding sign says "All because two people fell in love." Choose something that will be special and meaningful to you!

Cut your second design with a coordinating color of vinyl and use the same method to transfer the letters to the sign. Place the date centered on the bottom of the sign and the phrase centered on top of the name.

Learn how to create a DIY Family Sign personalized with your wedding date! These signs also make great gifts for showers and weddings! Get the how-to at LoveGrowsWild.com #wedding #diy

I chose white vinyl for the name so it would be light and fade into the background, and I used black vinyl for the rest of the letters so they would stand out. You can use classic colors like these or try playing around with the colors of your wedding! Just don't forget a tape measure to help center your designs.

Learn how to create a DIY Family Sign personalized with your wedding date! These signs also make great gifts for showers and weddings! Get the how-to at LoveGrowsWild.com #wedding #diy

To ensure your sign will stay beautiful for a long time to come, I recommend sealing it with a few coats of polyurethane. I absolutely adore this matte poly from Varathane and have been using it on tons of projects lately. It dries crystal clear with a beautiful matte finish.

Learn how to create a DIY Family Sign personalized with your wedding date! These signs also make great gifts for showers and weddings! Get the how-to at LoveGrowsWild.com #wedding #diy

Once the polyurethane is dry you are ready to hang your sign! Add two sawtooth hangers to the back of the board and place it in a special spot in your home. Every time you walk past, it will bring back sweet memories and a smile to your face!


Learn how to create a DIY Family Sign personalized with your wedding date! These signs also make great gifts for showers and weddings! Get the how-to at LoveGrowsWild.com #wedding #diy

Learn how to create a DIY Family Sign personalized with your wedding date! These signs also make great gifts for showers and weddings! Get the how-to at LoveGrowsWild.com #wedding #diy

Learn how to create a DIY Family Sign personalized with your wedding date! These signs also make great gifts for showers and weddings! Get the how-to at LoveGrowsWild.com #wedding #diy

I love the way my sign turned out, and I hope it brings so much joy to my Aunt and her new husband as they begin their new life together! 

* * * If you would like a family sign of your own but don't want to make it yourself, I can create one for you! And don't forget, they are perfect gifts for showers and weddings! Just send me an e-mail at Lovegrowswild@gmail.com for more information and pricing. * * *


Let's Keep In Touch!
Subscribe to Blog | Follow on Facebook | Follow on Twitter
Follow on Pinterest | Follow on Instagram | Subscribe to Newsletter

P.S. I'm sharing this post at some awesome link parties... Check them out HERE!

This post has been sponsored by:
The Weary Chef features weekly menus of tasty, quick dinners PLUS kid dinner ideas, bonus recipes, and Friday cocktails! Follow The Weary Chef on Facebook and Twitter to never miss a recipe!

ShareThis

Related Posts Plugin for WordPress, Blogger...