
 HAPPY NEW YEAR!
2012 is gone, and I’m taking a look back at my top 12 posts from the year! This has been such an amazing year for me and my family, and 2012 was the year Love Grows Wild was born! I cannot wait to see what 2013 will bring… I have big plans for this little blog!!
So without further adieu, here’s a look at
Love Grows Wild Top 12 Posts of 2012!
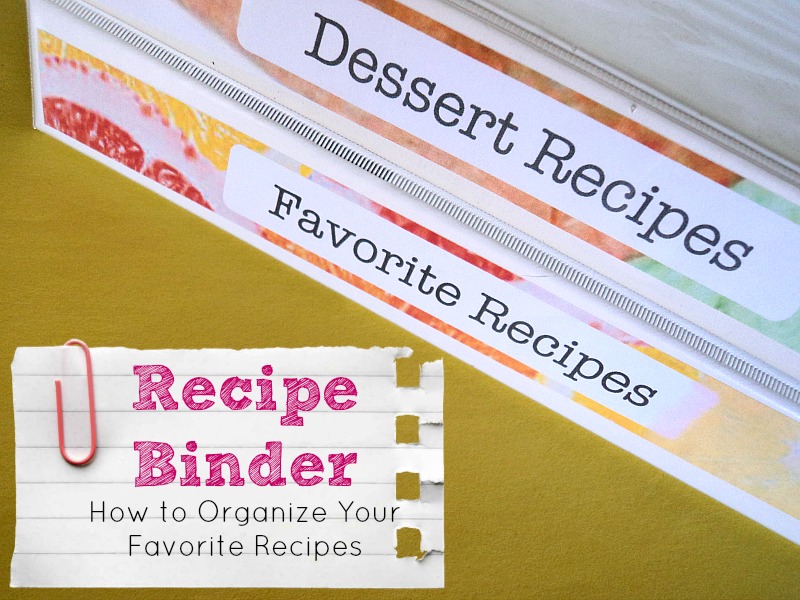
I’ve tried a million ways to organize my recipes, and this is hands-down the best! Recipe Binders make things easy to find and easy to keep up with your recipe organization. Mine includes sections for “recipes to try” for those days you get stumped on meals ideas!
To celebrate our 1 year wedding anniversary, I co-hosted a Wedding Week series on all the details of our wedding. I posted on everything from our hand-made pocket invitations, the wedding party attire, DIY decorations, our ceremony, my beautiful cake, our honeymoon destination, and lots of memories from that day! My co-host, Kelley from The Grant Life, was one of the first blog friends I made through this series! This post on my wedding decor was by far the most pinned of the series.

I love the Fall updates I made to my home decor this year, and this Sweater Pillow was one of my favorites! A turquoise button-up sweater from Goodwill became an adorable and cozy pillow cover!

I have had SO much fun decorating my boy’s bedroom in our new house. I made them a Paper Airplane Mobile from an old bike tire, added some Definition of a Hero Wall Art, tackled the DIY Rain Gutter Book Shelves I’ve seen all over Pinterest, and created a gorgeous Ruler Growth Chart using an old board and homemade vinegar stain. But this Lullaby Lyric Pillow is by far my favorite project I’ve done for their room. I hand wrote the lyrics to our favorite lullaby on a pillow for them to snuggle every night. It’s something my boys cherish!

Curtain rods can be expensive! This DIY Curtain Rod from electrical conduit only cost $1.67, and I was able to cut it in half and use it for two windows!

My breezeway got a woodsy makeover for Winter with evergreens, pinecones, and this Deer Head Burlap Pillow. It was easy to assemble and only uses a Sharpie to make the deer head! It goes perfect with my Winter decor, but is versatile enough to leave out all year around!

My most viewed Christmas project of 2012! This idea, adapted from The Crafted Sparrow, uses little felt triangles to create these adorable Felt Pine Trees.

When we first moved into our new home, my kitchen was in definite need of some organization! We turned an unused closet into an efficient and organized pantry. Lots of great storage ideas!

This Ruler Growth Chart was created using an old board, a Sharpie, and homemade vinegar stain. Simple and stunning! It fits perfectly in my boy’s bedroom.

Don’t you hate when the wick in your candle burns down the center, leaving tons of wax remaining around the sides? Don’t waste anymore money throwing them away! In this tutorial, I show you how to melt the candles down to create a new, layered candle!

My family LOVES tacos, but they can be so messy and hard for kids to eat! This Beef and Bean Taco Casserole solves that problem… all the goodness of tacos put together in a casserole! Your family will devour this meal!!

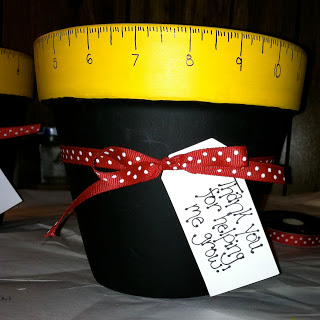
This was my VERY first project I posted and my MOST viewed of 2012! It has almost double the page views of my second most popular post! Beginner’s luck I guess : ) Even with the terrible photo, it’s still an adorable gift for teachers!
I just want to say thank you so much for reading Love Grows Wild, and I cherish each and every one of your comments, kind words, and friendship! I can’t wait to show you Love Grows Wild has in store for 2013! 


There are some really great projects here, thanks for rounding them all up for us to see! I love the pillow with the lullaby on it 🙂
I also did a top 12 of 2012!
http://jennsnotsoglamorouslife.blogspot.com/
Ah..You’ve got me hooked with the felt trees and the pantry. Thanks for posting since I’ve only found you recently. Pinning to remember!
Roxana @ Four Eleven Rox
Saw you on DIY Dreamer. What a great round up of posts, I just love that flower pot for the teachers. SO cute!
What an amazing, creative year! I would love to have you join in the party over at twelveOeight!
http://twelveoeight.blogspot.com/2012/12/chalkboard-labels-book-pages-and.html
xoxo, Tanya 🙂
Liz, 2012 was an AMAZING year creatively and personal (a new friendship was formed)!
Thanks so much for sharing this at The DIY Dreamer.. From Dream To Reality!! HAPPY NEW YEAR!!
Liz! You have so many wonderful projects up there! I love love your winter trees and I think the ruler is my other favorite, oh and the reindeer pillow 🙂 Can’t wait to see what you have in store for 2013 🙂
These are fantastic projects!! I love the sweater pillows.
<3 Christina @ I Gotta Create!
Wildly Original link party is open.